Two-guard runner
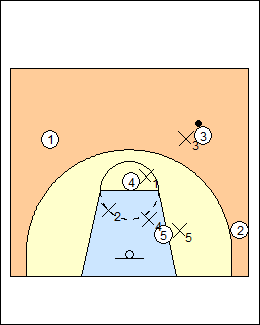
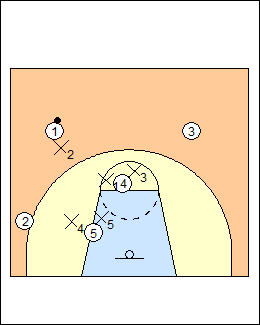
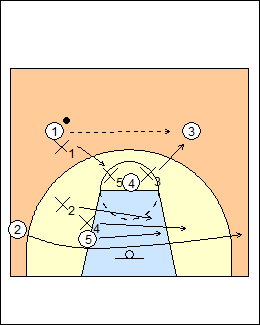
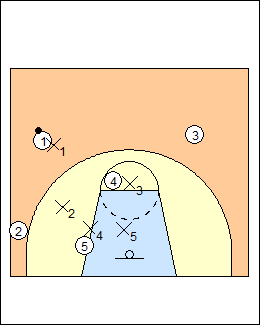 | 1 The attacking set has two guards, high post, low post, and baseline runner. See 1-2-2 vs. Three deep, also Duke runner (high post), 2-1-2, Double high posts. a) The high post is not considered a major threat. With X1 on the ball, X2 has 2, X4 has 5, X5 has 4 and comes ballside but stays low, X3 has 3 and helps cover the high post. |
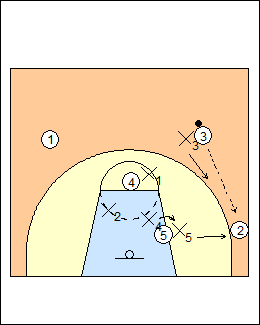
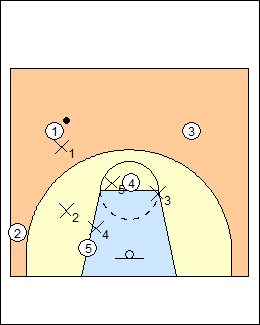
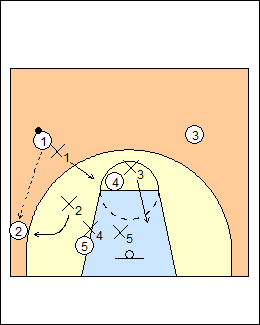 | 2 If 1 passes to 2, X2 closes out, X1 drops to help cover the high post, X3 sinks weakside. |
 | 3 X5 still has 4. |
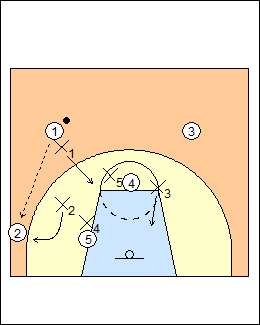
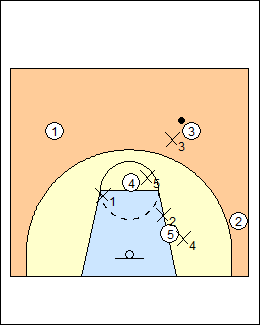
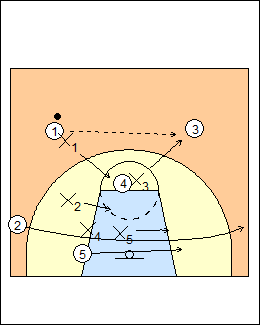 | 4 If 1 passes to 3, 2 and 5 change sides. X3 closes out, X1 drops to cover the high post. |
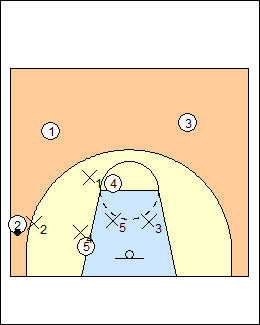
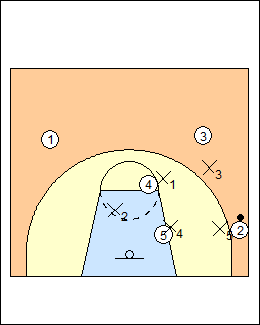
 | 5 X3 takes the ball, X5 has 2, X4 has 5, since there is an overload, X1 takes (and will stay with) high post 4, and X2 has 1. X1-X2-X3 will cover high attackers 1-3-4, and X4-X5 cover low attackers 5 and 2. Chris Oliver - on a pass to 4, try to re-set the zone, X4 has it, X5 has 5, X3 has 2, X1 has 3, see Defence - 32 match-up. |
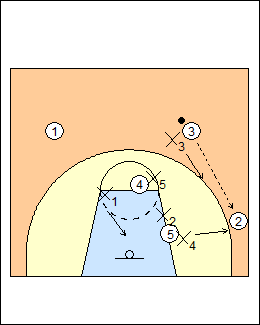
 | 6 If 3 passes to 2, X5 closes out, X3 can deny a return pass since X1 has the high post. |
 | 7 |
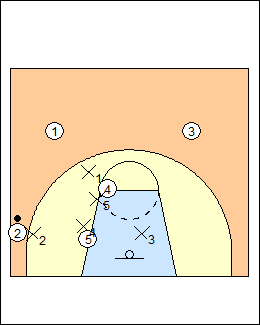
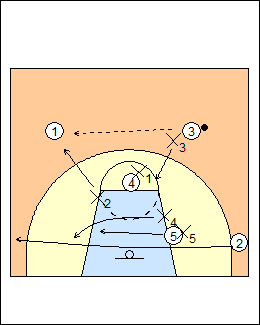 | 8 If 3 passes to 1, X2 closes out, X3 drops to help cover the high post. |
 | 9 X4 has 2, X5 has 5, X1 still has 4, X3 has 3. |
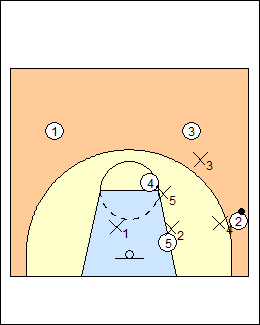
 | 10 b) The high post is considered a threat. X5 comes up to guard 4 with X1 on the ball. X2 and X4 will guard 2 and 5. Hoop Tactics - X5 takes and stays with the post. |
 | 11 If 1 passes to 2, X1 drops to help on the high post, X3 sinks weakside. |
 | 12 X1 and X5 can pinch the high post. |
 | 13 If 1 passes to 3, X3 closes out, X1 drops to help on the high post. X4 and X2 go with 2 and 5. |
 | 14 X4 has 2, X2 has 5. |
 | 15 On a pass to 2, X3 denies a return pass, X1 drops to protect weakside. |
 | 16  |
This page was made with Basketball playbook from Jes-Soft