Chris Oliver
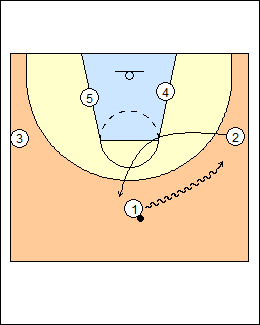
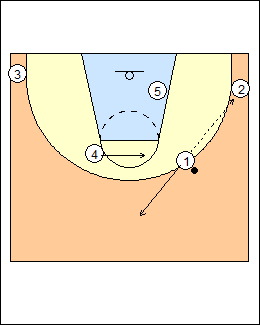
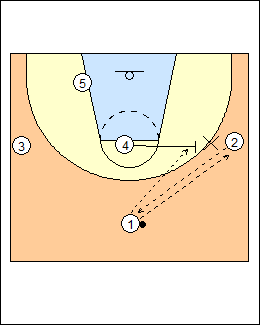
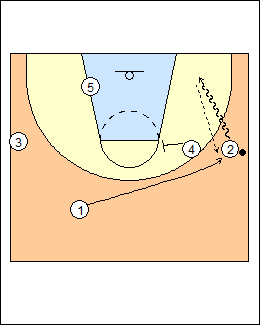
 | 1 Basketball Immersion See YouTube video - Zone quick hitters that work, also Zone set plays - Cycles. 1) 1-4 high set 2) 3-out 2-in 3) Horns 4) 1-3-1 5) 4-out 1-in 1) 1-4 high a) 1 passes to 2 who makes a return pass (boomerang), distorting the zone, 1 hits 4 or 5, the other high post dives. See Zone offences - Geno Auriemma, Huggins dive and fill. |
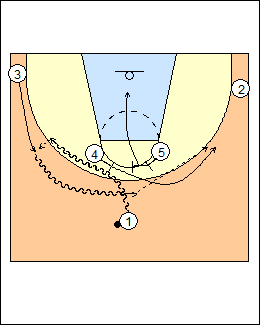
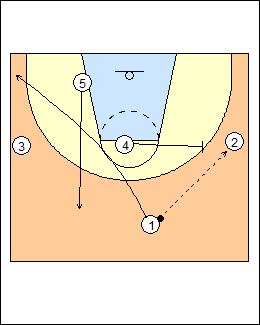
 | 2 b) From a 3-out 2-in set, 1 shallow cuts 2 to the top. |
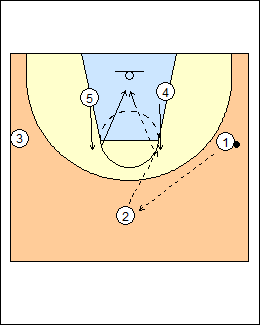 | 3 A pass to 2 cues a high-post flash by 4 and 5, on a pass to one post the other dives.  |
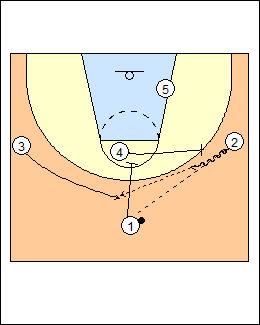
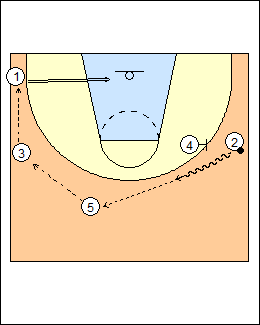
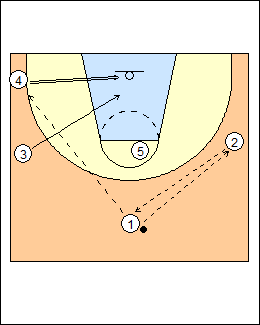
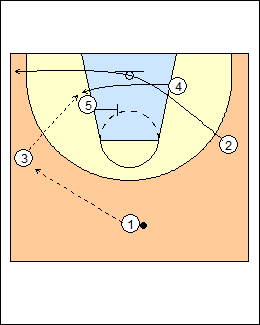 | 2) 3-out 2-in 1 passes to 3, 2 cuts weakside, 5 screens the middle defender for 4 to come under. (Option - use 1-2-1 boomerang passing) See Zone set plays - Oregon 5, UConn point, Bill Self #3. |
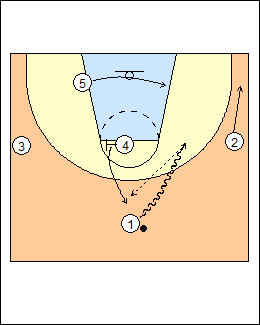
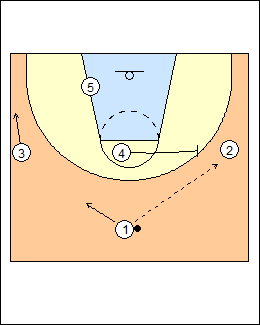
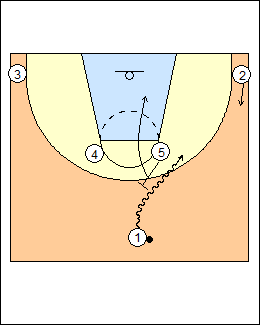 | 3) Horns a) 5 comes out, picks and rolls. |
 | 6 1 passes to 2 and spaces, 4 flashes to the ballside high post. See Zone offences - Hubie Brown 1-4, Memphis X. |
 | 7 b) 1 comes off 4's ballscreen into a DHO with 3, 5 flarescreens for 4 then dives. |
 | 4) 1-3-1 set The high post screens, seals and finds space. a) 1 passes to 2, 4 ballscreens, 1 pin screens for a pass to shooter 3 out top. |
 | 9 b) 1-3-1 passing, the boomerang sets up a pin screen on the weakside top defender. |
 | 10 1 attacks, 5 comes under, screener 4 may be open up top for a throwback. See Zone set plays - Izzo arm chop. |
 | 11 c) 1-2-1 passing, the boomerang sets up 4 to seal out the ballside top defender. See Zone offence - 1-3-1 basics. |
 | 12 d) 1 passes to 2 and clears to the corner, 4 ballscreens, 5 comes high weakside. |
 | 13 2 comes off the ballscreen, swing the ball to the corner for a shot. (Get the best shooter in the corner) See Zone set plays - Wave sidescreen. |
 | 14 e) Ballscreen and screen back - 1 passes to 2 and starts to space, 4 ballscreens. |
 | 15 2 rejects the screen, 4 screens for 1 filling behind. |
 | 5) 4-out 1-in 1 passes to 2, 3 backcuts on a return pass, 1 skips the ball to 4. (Variation - 3 stays, swing the ball from 1 to 3 to 4, see above) |
This page was made with Basketball playbook from Jes-Soft