Michael Lynch
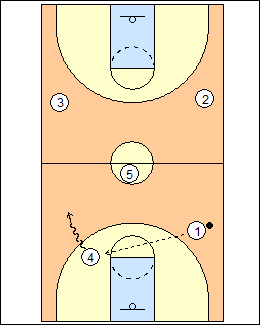
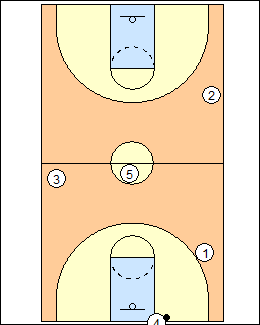 | 1 Michael Lynch www.coachlynchbasketball.com In breaking presses, keep things as similar to normal transition offence as possible. 1) Breaking Zone Presses a) Regular press break Backside 3 stays in the backcourt so they have a player to swing the ball to. |
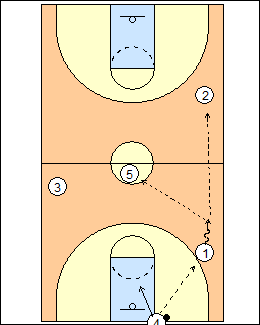 | 2 On an inbounds pass, 4 steps onto the court as an outlet option for the ball. 1 looks for 2 up the sideline then 5 in the middle . 5 steps forward to meet a pass, in the backcourt. Once the ball advances past the three-point line, 5 can begin to look for gaps that may be past halfcourt. (Dribbling across halfcourt may be another option for 1.) |
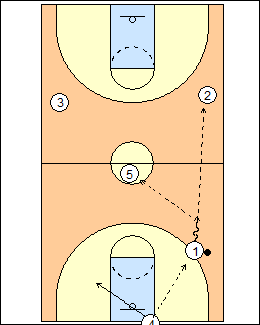
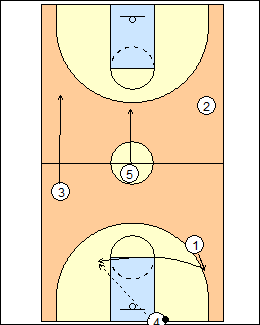
 | 3 If 2 and 5 aren't open, check the ball down to 4, who looks for 5 then swings the ball to 3. When in doubt, check down. 3 looks to skip pass to 2, hit 5 in the middle, or dribble across halfcourt. If none of these options is available, check down again. (Option) - while there is a sideline option on the first side of the floor, 3 does not have an option up the sideline after ball reversal, 2 can cross the floor up the ballside sideline (e.g. if 3 is double-teamed), see below. See Press breaks - Dave Odom (Press attack), Canada Basketball, and Middle (for a full rotation). |
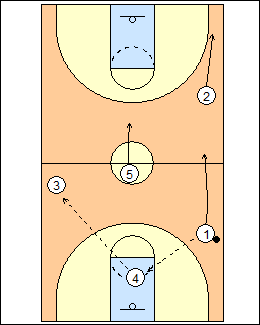
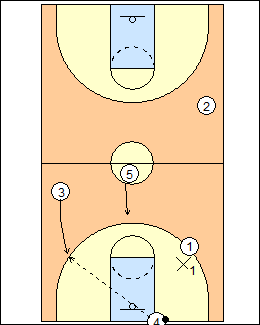
 | 4 b) Stretch Alignment Backside 3 moves into the frontcourt to stretch the defence, and 4 comes in weakside (a 2-1-2 set). The stretch alignment can force a back defender to cover both sidelines, cause longer coverage rotations on a check-down pass, and probably lower the threat of a denied inbound pass. Options are the same - sideline, middle, check down (a skip pass to 3 becomes another option). |
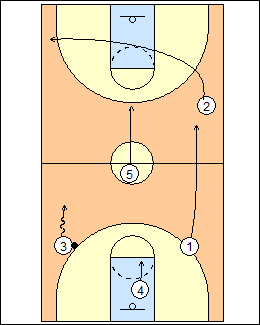
 | 5 On a check-down pass, 4 looks sideline, middle, skip pass to 2. (Dribbling across halfcourt may be another option.) Player skills affect a decision to use the stretch alignment. See Press breaks - 2-1-2. |
 | 6 2) Breaking Man Presses Use the regular alignment. Try to get the ball to the point guard right away, then "give it room to breathe" (work 1-on-1). Ideally, 1 can release and catch on the ballside, which they get routinely in live-ball situations. If denied, 1 face cuts to the other side of the floor. Posting up his defender is another option, e.g. if 1 is taller or slower than X1, or on a dead ball. See Middle - 5 flashes back if 1 is not open on the face cut. |
 | 7 3 and 5 are ready to help, as the probability of 1 being denied is higher. In most cases, a flash by 5 is not needed. See Hoop Tactics - on an inbounds pass to 5, 1 would cut up the middle. |
 | 8 3 has point-guard status, with room to work 1-on-1, and a check-down option to 4. 2 changes sides of the floor to be a sideline option (on the first side of the floor).  |
This page was made with Basketball playbook from Jes-Soft