1-3-1 zone motion
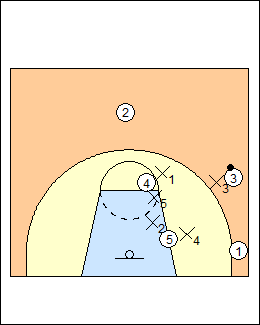
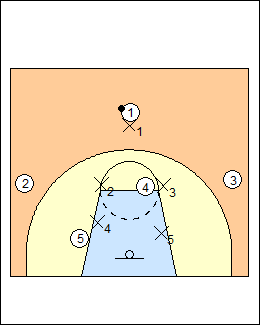 | 1 The attacker at the top passes and cuts, ballside or weakside. a) The high post is not considered a threat. Here X5 has 4 to start, and stays low. |
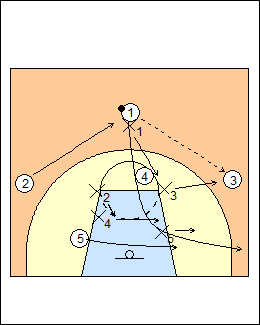 | 2 1 passes and cuts ballside, 2 fills, 5 changes sides. X4 comes across with 5, X2 sinks. |
 | 3 With an overload, X1 takes high post 4, X2 takes 2. X3 is on the ball, X5 has 1, X4 has 5. X4 and X5 pinch the low post. See 32 matchup (2 is spaced away). |
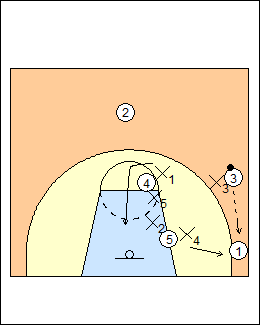
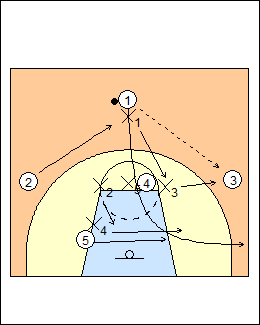 | 4 b) High post 4 is considered a threat, so X5 comes up when X1 is on the ball. X4 comes across with 5, X5 stays with 4. Hoop Tactics - X1 denies 1's basket cut, switches with X4, pops back out to the elbow, X2 sags off weakside. X5 denies 4. |
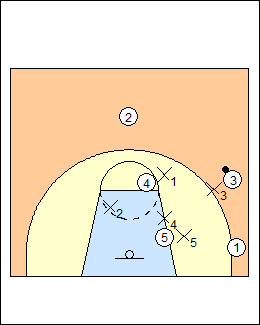
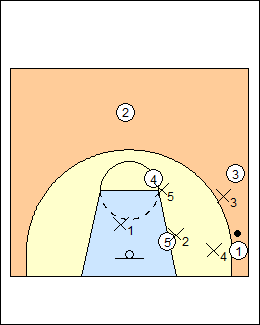
 | 5 Match-ups with X3 on the ball - X1 has 2, X5 stays with 4, X4 has 1, X2 has 5. Note that 4 is one man to X1's left, but X5 stays matched up, so X2 takes 5. |
 | 6 On a pass to the corner, ideally X1 can get into a help position in the lane, X5 has the high post. |
 | 7 |
This page was made with Basketball playbook from Jes-Soft