Zone set plays
Dave Odom
| 1 Dave Odom
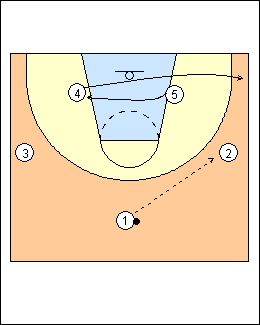
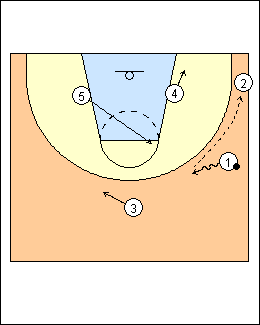
1 passes to 2, offside 4 runs to the ballside corner, 5 replaces 4. (Variation - 5 pops out to the corner, see Zone set play - 5star push) |
| 2 1) Corner
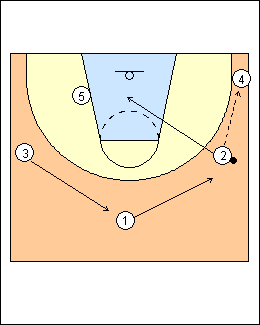
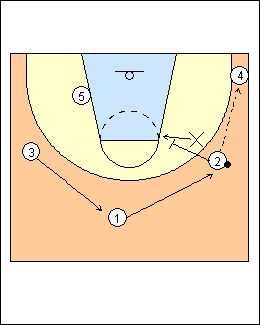
2 is a shooter, he passes to 4 and buries himself in the middle of the lane, 1 and 3 rotate over.
A pass to a corner distorts the zone. Diamond overload vs a 1-2-2 zone (Fastmodel) - 5 flashes to the ballside high post on the initial pass to 2, forcing the weakside low defender to shift up, if the ballside low defender closes out on 4, 2 will be open on the basket cut. |
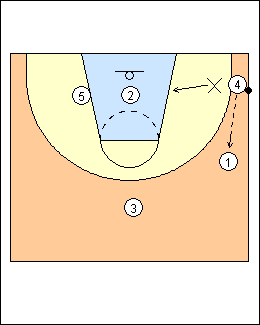
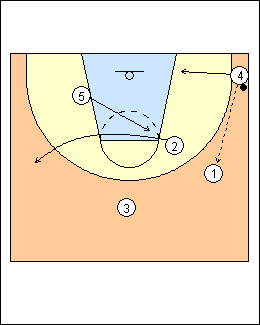
| 3 When 4 passes to 1, the defender who came out to the corner will kick back in. (Option - 5 flashes high on the pass to 1) |
| 4 4 walks in to screen the defender, 2 replaces 4 in the corner. |
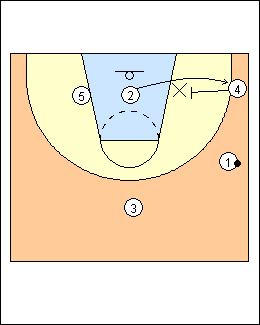
| 5 1 makes a dribble throw-back to 2, 4 gets his back on the baseline, 5 comes to the high post for a high-low. |
| 6 2) Notch
1 is the shooter. 2 passes to 4 and walks in to screen the defender kicking back to the high post on the pass to the corner. 1 and 3 rotate over. |
| 7 On a pass to 1, 2 gets out backside, 4 and 5 get to a high-low. |
|
|