Pistons motion
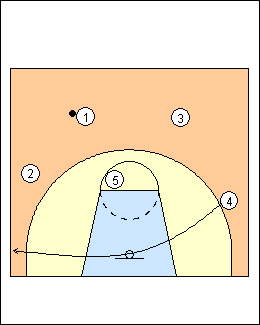
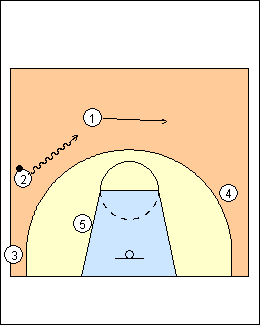
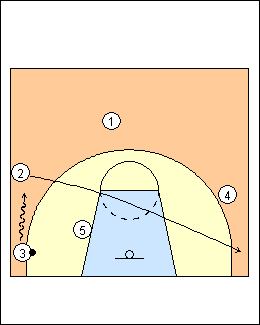
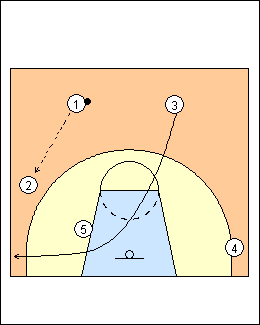 | 1 These are zone-attack sets, cuts and options used by Flip Saunders in going through his 1-2-2 match-up. See China, Nets chin series, Versoix overload, Duke. Entry options 1) 1 passes to 2, a) 3 makes a strong-side cut (shown) b) 4 runs the baseline to the strong-side corner |
 | 2 c) 1 cuts up the middle then to the ballside corner |
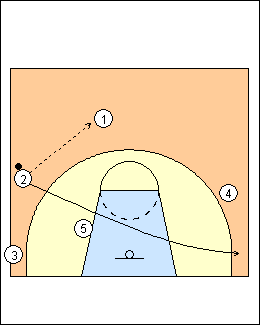
 | 3 d) 1 cuts in front of X1 to the ballside corner |
 | 4 e) 1 cuts to the weakside corner |
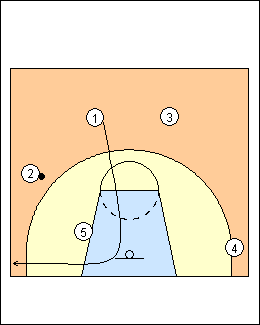
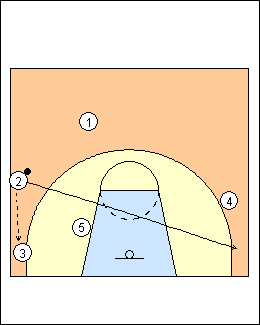
 | 5 2) 4 cuts through before 1 makes a pass (3 could cut instead). 5 is at the high post. |
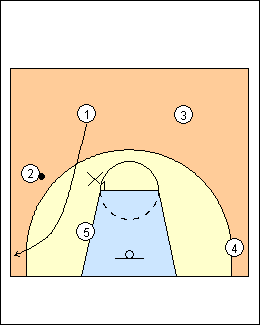
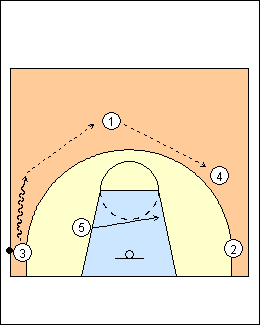
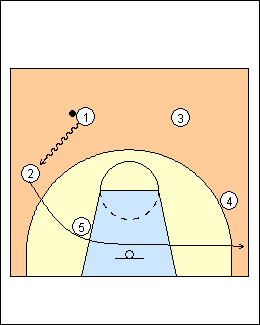 | 6 3) 1 dribbles out 2 to the weakside. |
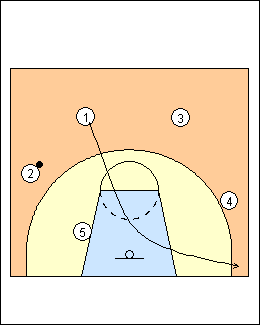
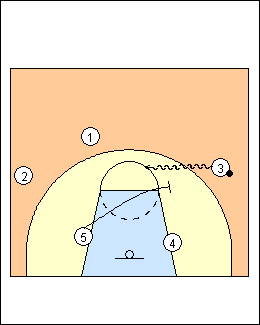
 | 7 Here 1 has passed to 2 and 3 cut to the strong-side corner for a triangle overload. a) 2 passes back to 1 and cuts to the weakside corner, or 3 runs the baseline. |
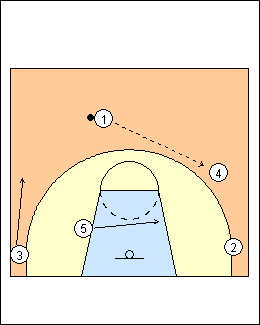 | 8 (For continuity, 3 would come out of the corner, re-set on the other side) |
 | 9 b) 2 dribbles at 1, who spaces away. Other options are a dribble hand-off, or 1 crosses with 2. |
 | 10 c) 2 passes to 3 and cuts weakside. |
 | 11 (For continuity, 3 would dribble out of the corner to re-set) |
 | 12 d) 2 passes to 3 and stays for an overload situation with the ball in the corner. |
 | 13 3 dribbles out of the corner, clearing 2 to the weakside (or 2 could come back to the ballside corner). |
 | 14 Pick and roll |
This page was made with Basketball playbook from Jes-Soft