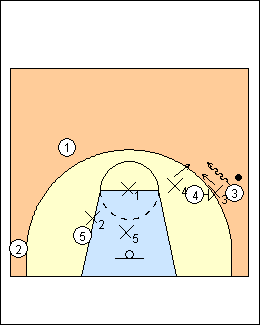
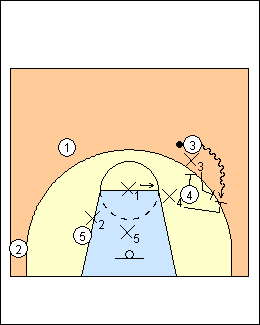
 | 1 Kevin O'Neill Sidescreen Offensively, 4 comes out from the elbow to set the screen (he can't make 3 come uphill and let X3 slide through). 3 steps over baseline to set up his man, the weakside is in a "tilt", with 5 ready to duck in and 1 and 2 ready to shoot. The screener pops back or rolls to the basket. Defensively, xscreener X4 calls the coverage (e.g., show left) and X3 goes from a no-middle stance to driving the ball to the screen, giving 3 only one way to go. X1 is the X-man, on the nail, X2 is the hold man, and X5 is the rotator, they go to these spots and call them out. When a big goes out you know it's to set a screen. |
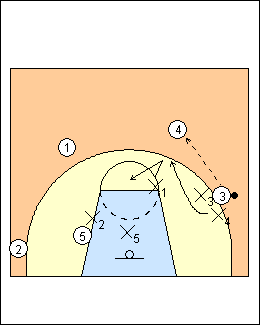
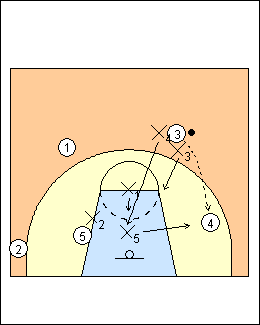 | 2 a) Blitz (trap) X3 and X4 stay with the trap until 3 passes or takes two hard dribbles towards midcourt. High hands, force a hang-time pass, no split or dribble-around. Recovering on a pass, the trappers get to the line of the ball, X3 sprints to the elbow, X4 sprints to the basket. On a pass to 1, everyone recovers to their own. On a throw-back to 4 (shown), X5 takes the ball and X4 takes 5 (X5 and X4 switch). X2 gets an arm in front of 5 as X4 is recovering, then gets back to 2. On a skip pass from 4 to 2, X1 would take him. |
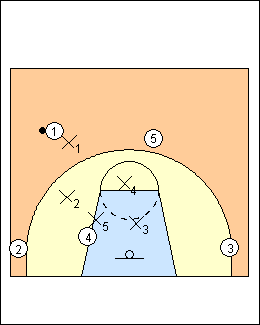
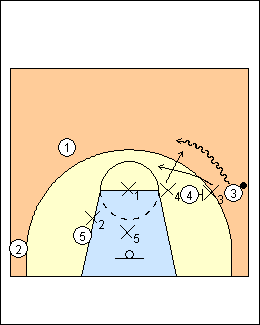 | 3 b) Show X4 shows high, chest to the ball, X2 goes over the screen but under X4. X4 will get back to 4 (no switch), 4 is not a great shooter. |
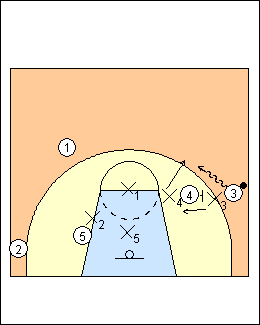 | 4 c) Contact switch Switch on a small-small or big-big ballscreen, or the last 8 seconds regardless of size. X4 is at the level of the screen, hand on, jumps the dribbler hard, X3 goes behind the screener to pick him up. |
 | 5 Step-up ballscreen Blitz until a pass, use the sideline and baseline to trap. X1 moves over. |
 | 6 X1 stunts at 4 on a throw-back then gets back to his, X4 recovers to 4. If 4 is a great shooter, call a rotation for it. |
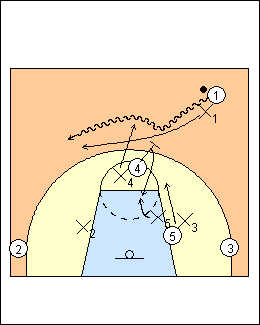 | 7 High Screen a) Show high-low 2 and 3 are in the corners, X2 and X3 squeeze to the paint (shrink the floor) when they see the ballscreen. 4 picks and rolls, 5 replaces. X4 shows high, X1 goes over the screen but under X4. If you show high, stay high. X5 takes roll guy 4, meeting him high and standing him up. |
 | 8 X4 recovers to the foul line (shrink position) and guards 5. Other ways to guard the high screen include going under (1 can't shoot), blitzing, and switching. |
This page was made with Basketball playbook from Jes-Soft